Tuesday, October 30, 2012

The older you get, the faster time flies....

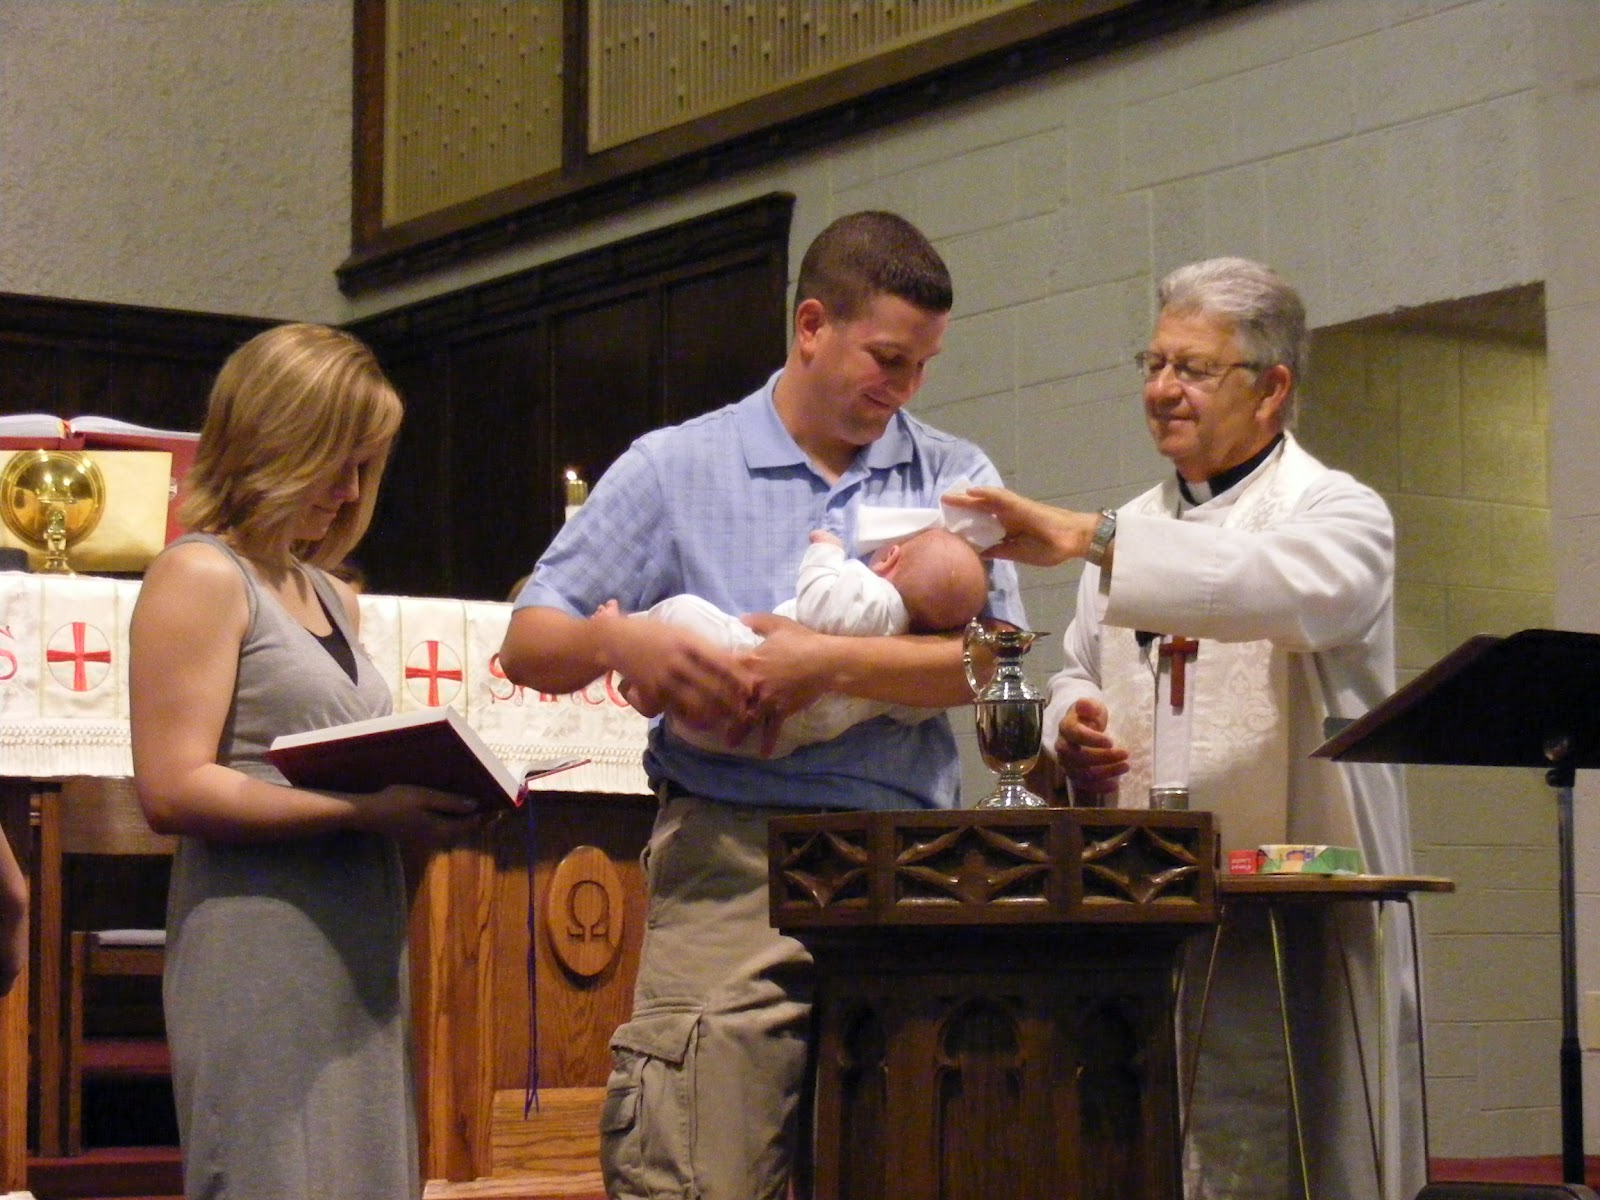
...At least that's certainly the way it feels these days. 

I'm not totally sure where the last four months have gone, besides from the bottom of the calendar to the top, but they were, for the most part, a GREAT time!  I hope you can forgive me for not posting more sooner!  Hopefully I can catch you up in posts shortly.


Just another trip to the field...This side mirror will never tire of seeing this road...
A dear friend over at Sandhills & Cow Patties recently put it out there that she was looking for recipes for Cinnamon Rolls to curb her Hubby's appetite for them.  Then he corrected her and asked for CARAMEL Rolls instead.  (Apparently he's never had a Wheat Montana Cinnamon Roll that I dream about to know they can be better sans caramel!)  I know these are not Caramel Rolls, but I think they are better since they are bite size, take less work, don't need a fancy pan and are great for mornings when working cattle is top priority (which is what she wants the recipes for anyway).

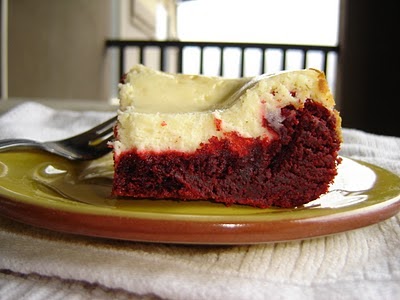
I probably wouldn't have tried the recipe, but D pulled it out of a little magazine we get up here called North Dakota Living.  Good luck with yours!  I hope you enjoy them as much as we do!  Sorry I don't have any pictures but the last time I made them and meant to take a picture they went from pan to hands and mouth too fast to get a good picture!


CARAMEL PULL-A-PARTS

2 Frozen loaves of Rhodes Sweet Bread Dough, thawed
Cinnamon
Sugar

Syrup:
3/4 cup Vanilla Ice Cream
1/2 cup Sugar
1/2 cup Brown Sugar
1/2 cup Butter (don't substitute Margarine)

Cut dough into balls and roll in the cinnamon and sugar mixture.  Put into a greased 13x9 pan to rise. 

After rising, combine syrup ingredients and stir in saucepan over medium heat.  Cook until sugar dissolves; DO NOT BOIL.  Pour syrup over rolls and bake at 350* for 30-35 minutes.  Flip pull-a-parts onto a cookie sheet to serve.


MY NOTES:
Make the balls fairly small as they rise quite high and quite fast, and you don't want them too much higher than the pan (which is why my tops were almost burnt before my bottoms were done the first time I made them (I had too big of balls to start)).

If the caramel isn't going in between the balls of dough, use the handle of a wooden spoon to poke holes between the dough balls to separate them.

Melt the butter THEN add the sugar and ice cream so that you aren't waiting on the butter to melt.
In our  9" x 13" pans it usually only takes a loaf and a half of dough to fill the pan, so if you're able to cut yours in half you can definately get two pans out of a bag of dough.

Good Luck ~C~ on your quest for good Caramel Rolls!  I hope all who try this recipe enjoy them!

Always ~
Christine

Wednesday, June 27, 2012

Penny. Penne!


We have returned!  We survived coastal Alaska, Victoria, BC and each other in the group!  I'm pretty sure I have close to 2000 pictures to go through now, but hopefully a couple of them turned out well enough to have printed on Canvas to be some new art in our house. 


We also celebrated D becoming a Godfather for the second time this year!  Congrats BRP!  We love you so much!


This recipe we tried awhile ago but it definately would have been perfect for a busy post-vacation week.  This one came to us on one of those catalina things that prints out when you buy certain foods/items at the grocery store and the cashier hands it to you with your receipt.  I did not feel like there was enough of the cooking cream to place on top so I just mixed it all in with the sauce and topped it off with more Mozzarella.  Next time we make this I'll probably take two tubs of the cooking cream out so I have enough to put on top as well.  I hope you enjoy this!  This would also be a good one to make up in the morning or night before and have sitting in the fridge ready to go in the oven when you get home at night.  (Sorry no photo...as this didn't come from someone else I can't borrow theirs and the camera was still down when we made this one!)


Baked Penne


1/2 lb. Extra-Lean Ground Beef
1/2 cup EACH Chopped Onions & Green Peppers
1 (24 oz.) jar Spaghetti Sauce
1 (10 oz.) tub Philadelphia Italian Cheese and Herb Cooking Creme, divided
1 cup Shredded Mozzarella Cheese, divided
3 cups Cooked Penne Pasta


Heat oven to 350*F.


Brown Meat with Vegetables in a large non-stick skillet.  Stir in Spaghetti Sauce, 3/4 cup Cooking Cream and 1/2 cup Mozzarella; cook and stir 2 -3 minutes or until Mozzarella is melted.  Add Pasta; mix lightly.


Spoon into 2-quart casserole dish.  Top with remaining Cooking Creme and Mozzarella.  Cover.


Bake 20 minutes or until heated through, uncovering after 15 minutes.

Wednesday, June 20, 2012

Beef! It's what's for dinner baby!

Hi Everyone!!!

I promised you a new recipe from me every Wednesday and I might be on vacation, but Blogger has this great little thing called "Schedule" that lets me set this up so that I can have this post appear to you today while I'm in the middle of the ocean or hanging out looking at mountains or whatever we are up to at this exact moment.  Wish you all could be here with us!  Enjoy this Stroganoff recipe I found over at Eat Cake For Dinner.  My mom wasn't one to make Stroganoff when we were growing up, but the neighbor did and would invite us over every once in awhile.  This reminds me a lot of Mrs. St.'s recipe.  I hope you all enjoy!


Beef Stroganoff from Scratch

1 lb. Top Sirloin or Tenderloin Steak
1/2 tsp. Kosher Salt
1/4 tsp. Black Pepper
3 Tbsp. Butter, divided
8 oz. Mushrooms, chopped
1 cup Onion, diced
4 cloves Garlic, minced
2 - 2 1/2 cups Warm Water
3 Beef Bouillon Cubes
5 Tbsp. Flour
2 tsp. Worcestershire Sauce
3/4 cup Sour Cream


Slice Steak into strips 1/4" thick and about 2" long.  Sprinkle with salt and pepper and set aside.  Melt 2 Tbsp. of the Butter in a large skillet over medium heat and then add  Mushrooms, Onion and Garlic to the pan.  Slightly increase the heat and melt 1 Tbsp. of Butter in the pan.  Add Beef and saute, stirring for 3-5 minutes or until pink is no longer visible.  While the beef is cooking, whisk water, bouillon, Flour and Worcestershire Sauce together until smooth.  Add this mixture to the beef and return the musroom mixture to the pan as well.  Bring the sauce to a simmer and cook for 1-2 minutes to thicken.  Remove pan from heat and stir in Sour Cream.  Add additional salt and pepper to taste.  Serve over Egg Noodles or White Rice.

** NOTE:  I used Ground Hamburger instead of Steak and we loved it this way too!


ENJOY!  See ya' in a week!

CHRISTINE

Wednesday, June 13, 2012

Ole! Ole, Ole Ole!

YAY!!! We leave for our trip to the great state of Alaska in less than two days!!! I can't wait!!! I am unbelievably ready to have some time off of work, quality time with D without work or business distractions, and remember what true elevation looks like!  OH!  It also looks like there will be a chance to at least stop and say hi to Nan.  I miss her cranky, old face something fierce right now so that might be one of the parts I'm most looking forward to at this point. 


Our trip actually has us making three stops in Alaska and one in Canada.  All because of Canada we have to take our passports.  Which reminds me, I wonder what D did with those after he registered our trip.  I should probably go find those quick.

Nothing else is really new here, just packing and trying to be caught up at work before we leave.

This weeks recipe is more "South of the Border" than "North to Alaska", but when I found it and saw how easy it was going to be I knew if it turned out it would be perfect for weeks like this when we have so much going on it's nice to have supper ready when we get home at night.  It's also by those great and crazy sisters over at www.sixsistersstuff.com!  I wasn't too sure about them when I put everything in the crock pot.  It seemed like the liquid levels were off a bit, but you do want them dry and they came out perfect!  Before you put the chicken mixture on your tortilla try to squeeze out as much moisture as you can.  Trust me on this.  And trust me when I say that you HAVE to try this recipe one day.  It's even great as leftovers and that's a bonus in our house!

Thanks Six Sisters for the GREAT recipe! (And WONDERFUL
picture that made me want to try them in the first place!)


Slow Cooker Cheesy Chicken Quesadillas

4 Chicken Breasts
1 (14 oz.) can Diced Tomatoes (Rotel works as well!), undrained
1 small can Green Chilis
1 (8 oz.) package Cream Cheese
Tortillas
Monteray Jack Cheese (or your favorite kind of cheese/cheese blend)
2 Tbsp. Melted Butter (or olive oil)

Spray the slow cooker with non-stick cooking spray.  Place Chicken Breasts in the slow cooker.  Dump in the Diced Tomatoes, Green Chili's, and Cream Cheese.  Place the lid on the slow cooker and cook for 6-8 hours LOW or 3-4 hours on HIGH.  Once the chicken is cooked thoroughly, take it out and shred. Return the chicken to the slow cooker (mix it in and it will absorb some of the juices so it's not so runny).  Keep warm until ready to make quesadillas.

To make quesadilla, heat a skillet over medium heat.  Top half of each tortilla with cheese and a scoop of the chicken mixture.  If you want some heat, add some chopped jalepenos to the quesadilla.  Fold the tortilla over and press down.  Lightly brush melted butter (or olive oil) on both sides.  Cook two filled tortillas at a time (3-4 minutes each; until they are golden brown), turning once. 

Serve with your favorite salsa, guacamole, and sour cream.

** We did not use the Butter or Olive Oil and instead used our pannini press to make our quesidillas.


I hope you enjoy this recipe as much as we did!  I should go find those passports now and make sure they are in our carry-ons.  Here's a little Johnny Horton to help you get in the mood for our trip!


Wednesday, June 6, 2012

"He Man, Woman Hater!"


A much be-lated HELLO EVERYONE!!!  I apologize for such a long absence.  Many, many, many things have been going on here.  It seems like over the last couple of months the only time I've had to sit down and write to you I had the choice of writing to you or going to bed.  I have a DANG comfortable bed...Haha.

The seasons feel like they've officially changed out here on the prairie and with that a renewed promise to myself to write to you more often.  One of the things I/we have accomplished over my time away from you was to try several new recipes out. 


Yes Alfalfa!  We did get something accomplished while I was away from blog-land!  Many things actually but I'll start by sharing this one with you.


This recipe was given to me by my Grandma S. after she randomly tried it out of a cookbook that she hadn't opend in quite some time.  She had a point in the email with the recipe.  We get many new cookbooks over the years, but after you've tried everything you think you're going to like, how likely are you really to go back and relook at that cookbook and try something else?  Welp, like me she was in a cooking rut and wanted to try something new; only she opened a cookbook she hadn't in awhile. 

This Wednesday's recipe comes from the "Festival of Nations 50th Anniversary Edition Cookbook" that Grandma S. has in her kitchen. He Man Spanish Rice was a fairly quick and easy dish that did not overfill us when we ate it and we decided we'd try it again (as did the Grandparents!)!  I'm sure the boys in the He Man, Woman Hater's Club would agree with us and eat it as well!

He Man Spanish Rice

1 lb. Ground Beef or Buffalo
1/2 cup Chopped Onion
1/4 cup Chopped Green Pepper
2 or 3 Cloves Chopped Garlic
1 tsp. Salt
1 Tbsp. Chili Powder
1 tsp. Worcestershire Sauce
1 can Tomato Soup
1 can Water
1/3 cup Rice (Long Grain)

Cook the Meat, Onion, Green Pepper, Salt, Garlic and Chili Powder in a skillet until browned. 

Add remaining ingredients and cook for 30 minutes longer or until the rice is done.

Can lay shredded cheese on top and put in the oven to melt.


NOTES:  We did not have any long grain rice on hand so we used the Minute Rice we keep on hand and it turned out just fine.  We also did not put cheese on top and put in the oven; rather each person put their desired amount of cheese on top of their serving.


(Picture of my hometown borrow from
the Festival of Nations website.  It looks
to be around the early 1900's.?)

It's great when a town can get together and celebrate their heritage and where they've come from.  The Red Lodge Festival of Nations has been celebrated every year since 1950.  If you happen to be up in the area in early August this year (or any year) be sure and check it out!  It might seem kind of corny, but I can still hear old Joe Kosorok's accordian music (then again, he played that all year long...) and the festival theme song blaring out over the town speakers.  I never thought I'd miss it, but it does kind of have some nostalgic quality now. 

Anyway, I hope you find this recipe at least "O-Tay" in your book. 

Hope everyone has a "He Man" kind of Wednesday!

Christine


Friday, March 16, 2012

Not a Cake...Not a Cookie...Not a Cupcake....It's Bar Time!

 
No, not Bison Bar time (though one does always have a good time when they are at the Bison).  DESSERT Bar time!  Hmmm...Theme week here?  Rolo Cake Mix Bars earlier in the week and today Red Velvet Bars!


(Photo from Eat Cake For Dinner
Sorry, my camera is still down!)

For these bars you will need:

  • 1 stick Butter, softened
  • 1 German Chocolate Cake Mix
  • 1 Egg
  • 1 - 1 oz. bottle Red Food Coloring
  • 16 oz. Cream Cheese, softened
  • 1/2 cup Sugar
  • 2 Eggs
  • 1 tsp. Vanilla Extract


To make these bars:
  • Preheat oven to 350*F.
  • Combine the Butter, Cake Mix, Egg & Red Food Coloring.  Batter WILL be stiff!
  • Spread into a greased 9" x 13" cake pan. 
  • Beat together the Cream Cheese & Sugar until creamy.
  • Add the Eggs & Vanilla and beat until smooth.
  • Spread over cake batter mixture.
  • Bake for 40-45 minutes or until the bars barely start to pull away from the sides of the pan.
  • Cool COMPLETELY before cutting.

I enjoyed these bars.  I really did.  D was fairly undecided on them.  He thought he liked them, but the cream cheese layer didn't appear to be setting up right (and with the egg in there I wanted to make sure it was) so I left it in a bit longer.  Turns out it may have been TOO long.  My pan was a little dry, but could be because they were overbaked or because D cut into them before they were fully cooled.  Either way, I enjoyed them enough to make them again that's for sure! 

I've got to scurry home and finish PMS-SIL's Baby Shower present and the "Man-Shower" present D will be giving her husband (which the girls will be crashing later that day).  Sunday we'll be in heading North (not to Alaska, but maybe someday soon!) to watch a friends little girl in her first figure skating show.  So excited!

Have a GREAT weekend!  Hope all of you enjoy the GREAT weather we're supposed to have this weekend (or whatever weather is coming your way, wherever you are!)

Always~
CHRISTINE

Wednesday, March 14, 2012

"Joy, temperance, and repose, slam the door on the Doctor's nose!"

According to http://www.quotationspage.com/search.php3?homesearch=nose Henry Wadsworth Longfellow said those exact words at some point in his life (how they know this I'll never know nor will I sit here and question it either).  Right now though, those words slightly reflect how I feel about my nose and the doctors I've seen about it.  Right now I am fighting my THIRD sinus infection since Christmas!  (This one started coming in last Monday!)  For lack of better words, THIS SUCKS!  I feel like someone has slammed the door on my nose!  You can't provide me with a cure or a way to avoid getting another one, I'll slam the door on YOUR nose!

(One co-worker made it sound like this is how my face looked on Monday!)


(To some extent, this is more how I've felt at times! Haha...)


But, in the moments I was thinking clearly this last weekend I did try to make a couple of different dessert bar recipes that I've had stashed away to try.  (I'll share the other later this week.)  It seems as though if I bake on Saturday or Sunday I make enough or more than enough to last us through the week (pending guests and how good it turns out to be).  Today's recipe comes from the Six Sisters' Stuff Blog.  Though I have never met these girls I love them!  I find WAY too many recipes on their site to try (I'll definitely be featuring more recipes from them!), as well as many great tips and tricks to try out! 


(Do these not look absolutely delicious???
SO quick and easy!!!
Please forgive me for borrowing their picture!
My camera is not behaving right now!
Thanks Six Sisters' Stuff!)

Rolo Cookie Bars

1 (18.25 oz.) Yellow, Vanilla, or White Cake Mix, dry (I believe I used a Yellow cake mix.)
5 oz. Evaporated Milk (Make some Potato Soup for supper & use the remaining instead of cream!)
1/4 cup Butter, melted
40 Rolo Candies, unwrapped and cut in half  (I think you could have opened a few more and it would be even better!  Who doesn't love extra chocolate and caramel?)

  • Preheat your oven to 350*F.
  • Spray a 9" x13" pan with baking spray.
  • Beat Cake Mix, Evaporated Milk and Butter until combined.  (Mixture WILL be thick & sticky!)
  • Divide batter in half and press half onto the bottom of the prepared pan.
  • Bake until set (8-9 minutes) & remove from the oven.
  • Place the candies, caramel side down, on top of the "base".
  • Drop the remaining batter on top of the rolo's in teaspoon sized amounts. (I found it best to scoop out and, since it was so sticky, "break" and drop in chunks with my hands on top of the rolo's.)
  • Bake an additional 20-24 minutes longer or until the top begins to turn golden brown.
  • Cool completely before cutting into them (if you can stand to wait that long!).
These were super easy, left the kitchen fairly clean afterwards (ok, most of the mess was from something else I was cooking at the same time or had just cooked!).  Plus they are a bar that hasn't gone bad quickly so they've lasted us a couple of days!  I hope you enjoy them as much as D and I have!

Happy Hump Day Everyone!
CHRISTINE